Series: Musket and Pike Battle Series, Volume III
Scenario: Alerheim
Participants: Bob H, Myself
Time: Thu, 5/10 ~ 7.00PM - 9.00PM
Sun, 5/13 ~ 2.00PM - 4.00PM
Thu, 5/17 ~ 7.00PM - 9.00PM
Sat, 5/19 ~ 2.00PM - 3.30PM

This is an interesting scenario as its got a fortified town smack dab in the middle of the map. It's also got some pretty interesting special rules. During the Battle, Mercy was killed (the Leader of the Bavarian forces) and the French were able to talk the Bavarians into surrendering in the Center. The town also caught fire during the battle leading to much confusion. The French outnumber the Bavarian/Imperial Force by about 25% in Infantry and 45% in Cavalry. The French are on the Offensive while the Bavarians have the town as well as nearly all of their other forces behind fortifications. The French are also hampered by not being able to use (move through) the gully on their Right until the Bavarians do (they had not thoroughly reconnoitered it prior to the battle). I ended up being the French player.
 |
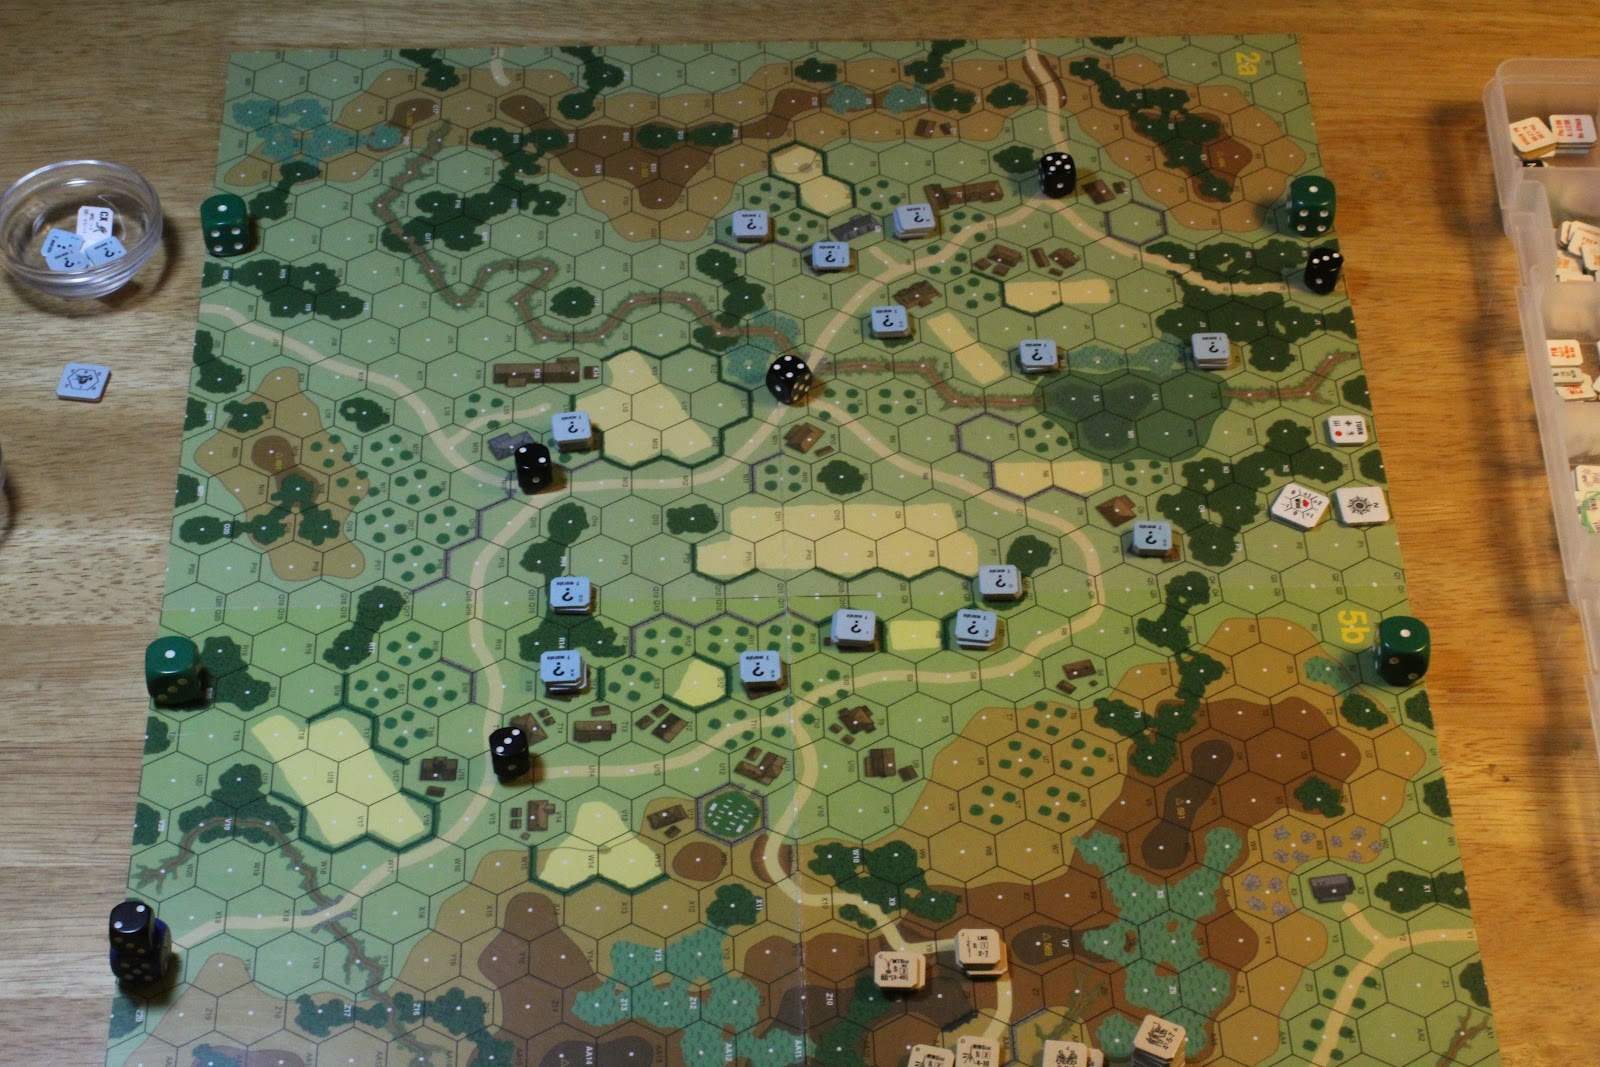
| Alerheim Set Up |
After I set this up I had a couple days to think about it before we started playing. Several times I told myself that there was little to be gained by smashing my Center wing into the town to start things off. I have played this series enough to know that I would end up getting the short end of the bargain on that one. Yet in this game (to its credit) its hard to pull off what I wanted to do, which is lead with the Left wing and hold with the Center while the Left was decided. Do to the way that one is bound to move towards the nearest enemy unit when under Charge orders I knew that some of my left wing would drift over to the town. So in the end I elected to lead with the Center first. Of course I had some nice Artillery in my Center and who can pass up a chance to open a Battle with a big salvo from his cannons?
Turn 1
As my Artillery harmlessly lobed shells into the town started my Center wing in towards the town. I used my first activation to fire my Artillery and align my forces to better engage Bob on the 2nd impulse. Since I had my Army Leader (AL) stacked with my Wing Commander (WC) I was easily able to continue the wings activation enabling my to engage Bob on the 2nd activation. Bob tried to preempt me here with his center and failed. As we started the melee's for that activation I realized why I didn't want to do this in the first place. I was getting shredded, but I did manage to push Bob out of one of the towns hexes in this initial assault. I lost two units as well.
 |
| The Assault on Alerheim (pre-melee) |
 |
| After Melee |
The action then shifted over to my Left Wing. Here I had a very nice force of mostly elite (8 Morale) Cavalry supported by six Hessian Infantry regiments (6 Morale) and a heard of sub par Hessian Cavalry. I was forced to cross a stream on the opening move so on my continuation (after Bob again failed to preempt me) I switched to Receive Charge and spent the activation redressing my lines (reform actions). Again I ran Conde (my -2 AL) over to help with the continuation and orders change rolls and this helped out quite a bit.
 |
| The French Left Wing Advances on Turn 1 |
 |
| The Bavarian Left |
Turn 2
 |
| Start of Turn 2 |
At the end of the first turn we started rolling to see which hexes in the town caught fire and three of them went up in flames. As my Center was the only wing in Charge we started there for the turn. I made one attack on the town which Morale Broke Bob's unit and made some cautious moves with the rest of my wing, trying to keep them out of the town. I was able to continue with the wing and switched them over to Make Ready (with Conde's help).
 |
| Turn 2 Action around Alerheim |
The action then went over to Bob's Left Wing. Bob was clearly leading them out to have a go at my Right Wing. I was amazed as I thought this was giving away the advantage of him being mostly behind the Gully which was not really a Gully. He continued and then switched to Charge and it was on.
 |
| de Werth leads his wing in an attack on the French Right |
 |
| Near the End of de Werth's activation |
Bob had a pretty good Wing, most of the units morale was 8, but he also had 5-6 "Arq-Busters"(Arquebusiers) which do not line up against normal Cavalry (Curassier) in melee very well (-1). Thus with him charging I was able to make Interception attempts (0-4 [on a d10] as I was in Make Ready) giving me the all important +2 Momentum DR for the melee combats that followed. So it went, he would move a unit forward and I would Intercept it and we'd have the melee, then he'd activate the next unit and before long we'd gone through most of his Wing. It was a viscous fight. Both sides lost several units while having several others pursue off the map (and thus be out for the rest of the game). Near the end of his activation, de Werth charged forward with a unit and ended up in front of his wins and facing my 3rd line of Infantry completely isolated.
 |
| End of de Werth's Activation |
When the dust settled after Bob's wing was finally finished with its assault, it was my turn to return the favor. I activated my Right Wing and they were able to convert to Charge mode. The first thing I did was go after de Werth and got him with a Cavalry charge. Bob rolled a 9 and de Werth was KIA'd (+10vps). It continued to go well for me after that. I then charged the unit that Mercy was stacked with and blew the melee roll, Bob rolled on the pursuit table and took me out, but it left him again in front of his lines with Mercy stacked with a FB (formation broken) Cavalry unit. I continued and was able to bring my Infantry up and take out the unit, sending Mercy off the map with very low odds of coming back on. This was turning into a disaster for Bob. We both lost a few more units and Bob had a couple fleeing in Morale Broken status as well. If Mercy didn't come back at the start of the next turn, I could start trying to get Bobs units in the town to surrender via the special rule for this scenario.
 |
| Mercy's Demise |
The rest of the turn was quite. Bob's Right Wing didn't do much. His Center stayed put and fired its Artillery while I finished reforming my Left with the remainder of the turn.
Turn 3
 |
| Start of Turn 3 |
Bob had a one in ten chance of having Mercy return to the game and he did it. He rolled a zero and Mercy returned to the map. I then made a roll for my Right Wing leader (Gramont) who also amazingly made a return (after exiting at the end of the last turn on a cavalry pursuit). We also had a chance to count up VPs due to losses and it was very close with Bob having lost 55 to my 65. With him still possessing the town and the other victory locations, I was still very much having to attack to earn a victory. We also rolled for fire spread and a few more hexes in the town went up in flames.
 |
| Action on the French Right, Turn 3 |
 |
| The French Right continues its counter attack |
The action then started again on my Right. I continued in Charge orders and sent several more units running under Morale Broken. I then Continued and switched to Rally orders to start reforming and rallying my remaining units. Bob spent most of his wings (his left) doing the same, ending in Rally mode and quickly trying to restore the confidence of the few units he had remaining.
Bob then did his Right Wing and then I did my Center...both of these activations were quiet with not a lot happening. I then brought my Left on line and converted them to Charge orders. Here I had the advantage in Morale and troops strength where Bob had the slope to his advantage. When my charging Cavalry came into view, he could intercept me and would have the added advantage of me just becoming FS (formation shaken) due to the crest line. Bob's luck didn't hold here though...we knew already that his dice liked to roll 0's (to get his leader back) and it continued to do so here on his interceptions. He went to his back up dice and this helped a little. When my wing finished I had taken the crest line and smashed his first line of cavalry. I wasn't in very good shape either but I had two more lines behind me and Bob only had one.
 |
| After the French Assault on the Left |
At the end of the turn we spread the fires in the town (it was really going now) and counted loss VPs. I had lost 95 VPs worth of units and Bob had lost 105. It was slowly turning in my favor, especially because I had largely won with my Right wing and still had some mopping up to do there whilst Bob didn't have much on his Left.
Turn 4
I started on my Left and converted the wing to Make Ready, reformed where I could and brought up the next two lines. I then continued and converted to Receive Charge and was able to reform most of the Wing. Here again my -2 leader was a real asset allowing me to have three crucial activations to reform the wind and re position it to continue the fight. Had I rolled poorly on my continuation attempts I would have been very vulnerable to counter attack my Bob. Bob went to Rally with his Right and started to reform/rally with his units, he had not interest in counterattacking me at this point. Here he made a grave error that we shall get to later. It didn't occur to me at the time.
 |
| Start of Turn 4 |
 |
| The French Left Wing Reforms on Turn 4 |
I then went to my Center and continued to move them around the town in Make Ready while Bob was shelling me with his Centers impressive Battery. I hoped that I would not have to charge his center with mine as his was still in good order behind fortifications and supported by artillery. Bob didn't do anything with his Center on his next activation so the action moved over to my Right Wing where I was in Rally. I converted to Receive Charge and moved to get back in command and reform where I could. My thinking at this time was to try and get around Bobs Center with the remains (5-6 units) of my Right and make trouble for him as I also assaulted with my Center. Of course in MPBS this is much easier to say then it is to do.
 |
| The French Right, turn 4 |
Turn 5
 |
| Start of Turn 5 |
My Center was the first Wing I activated on Turn 5. The front line of this Wing was taking a beating from Bobs artillery only 4 hexes away and so I stayed in Make Ready and reformed my first line as I continued to move the rest of the Wing around the town. Bob then went all 20th Maine on his left and converted to Charge Orders with his two remaining non-MB units. We split the melees and when it was my turn to activate my Right I also converted to Charge and tried to get his last remaining good order unit and was repulsed heavily. Bob then brought his Center on line and again pounded my first line of Infantry, inflicting more damage on their formation. He also started to move his Cavalry (2nd line of his Center) over around to his right to protect his Centers flanks, it was as if he was reading my brain waves!
 |
| The Bavarians repel the French Right |
My Left Wing was next up and I converted to Charge right away. Here is where we discovered the severity of Bobs error from last turn. As Bob's Right Wing was in Rally orders, he could not make interception attempts. This was huge as I was able to engage him without having to face his counter-charges. His second line of Cavalry was still in good shape and would have been able to disrupt my assault. I moved up and engaged five of his units. I won three of these fights. But again I was vulnerable as with this last activation I had moved the rest of my Wing up on the slope and all of them were in FS status. Then I uncharacteristically failed my continuation roll. Bob had 6 good order Cavalry units ready to charge me. He was heavily outnumbered though and was not going to be able to make use of momentum for most of the attacks. He was in Rally orders and his Army Leader was on the other side of the battlefield trying to keep the MB units on that side from leaving the field. His Right Wing Commander was only a 0 leader thus it would take some amazing dice to get that Wing into Charge orders quickly enough. Bob had had enough though and surrendered the field to me.
 |
| The Decisive moment on the French Left |
 |
| The French break the spirit of the Bavarians |
I was not convinced that he was totally out of it at this point though. We had not counted Loss VPs for two turns and while I was in the lead there he still had the VP location (+10 VP) which might have played a part. Non the less, Bob was done and we ended it there. After Bob left I counted up the Loss VPs and I was ahead by 50 (145-95) so adjusting for the VP location I had a 40 VP advantage. This was just enough for a French Decisive Victory. Had we continued I think baring some amazing dice by either one of us we would have been playing to decide what kind of French victory (Marginal or Decisive) it would have been.
 |
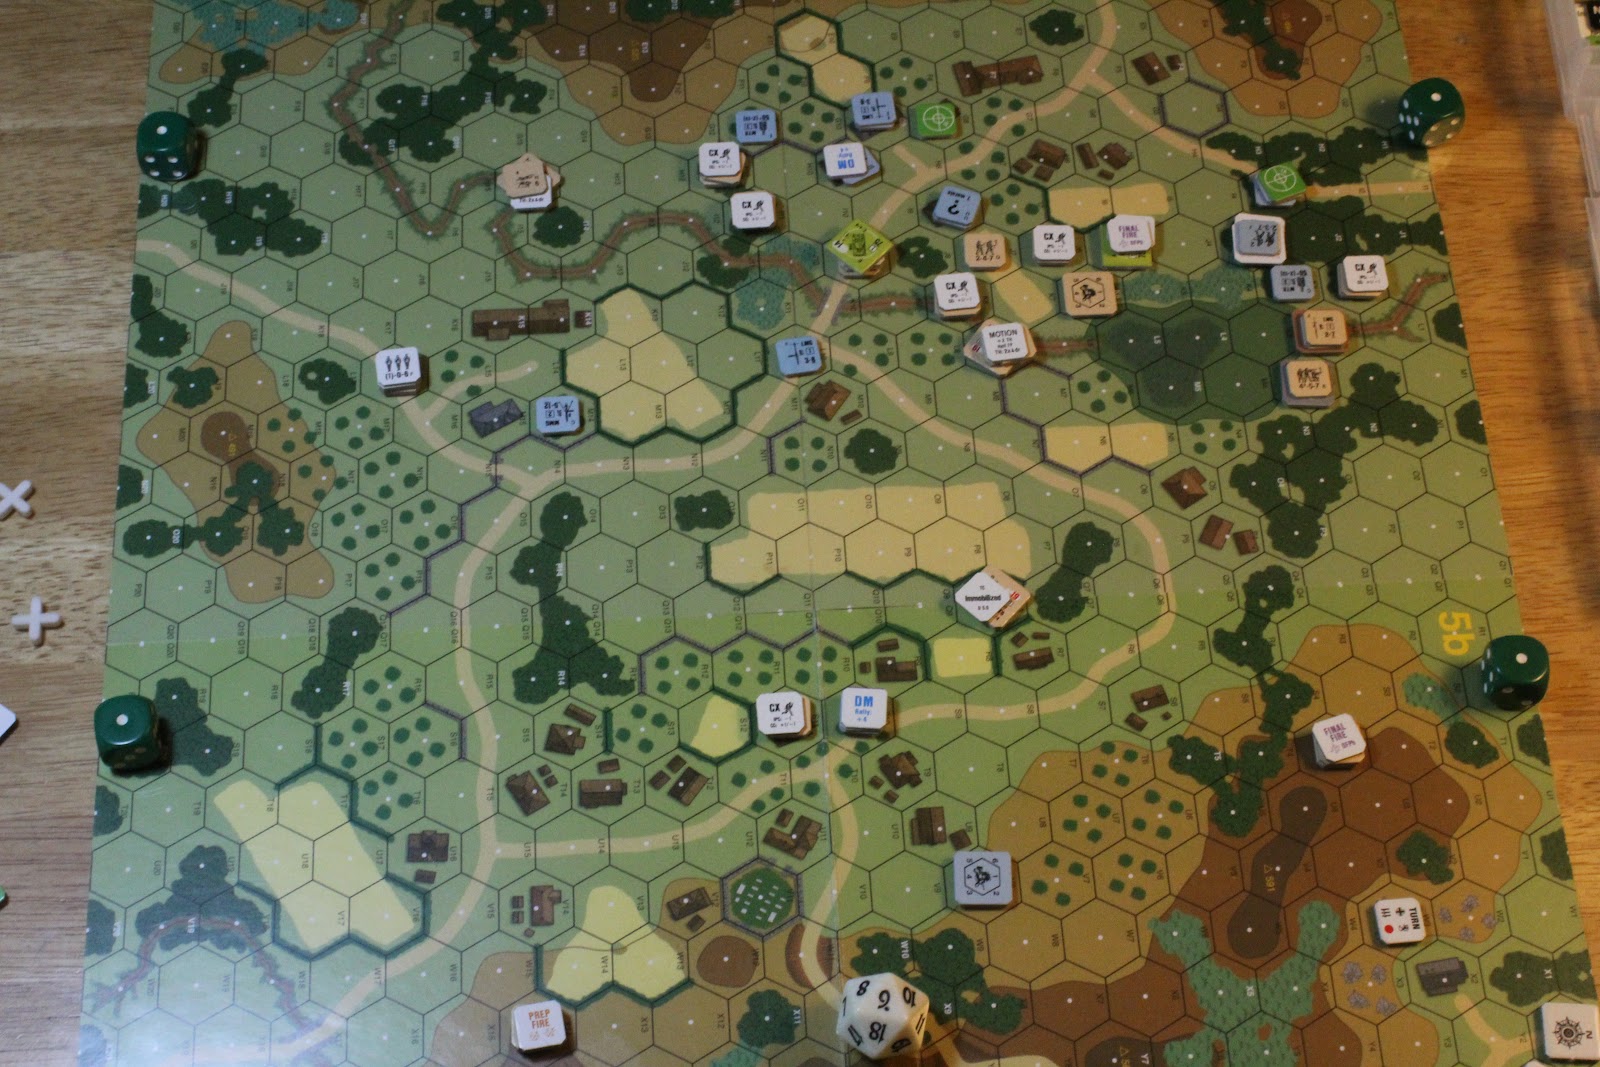
| Map at game end |
So this turned out to be one of the best MPBS experiences either one of us has had in many years. We played the scenario for over seven hours and that is rare for a MPBS scenario. The game was in doubt right up until the end of the 5th turn, which for us doesn't happen that often. Both of us thought that we did an excellent job of playing by the rules, which again was nice as we had only played the series once in the last couple years. Bob had a good time despite some terrible dice on his part. While I rolled well in some important continuation situations and again well in converting orders, the battle dice were mostly even except for when Bobs Right Counter-charged my Left. We both had several leader losses and equally improbable leader returns. Not a bad way to spend several days in May.