Powered By Blogger

Saturday, June 30, 2012

Advanced Squad Leader (MMP) ~ "Huns of Steel" 115

Game: Advanced Squad Leader (MMP)
Scenario: 115 - "Huns of Steel"
Publication: Module 12 - "Armies of Oblivion"
Participants: Jim "HeavyD" D, Myself
Time:  Fri, 5/4 ~ 7PM - 8.30PM
          Sat, 5/5 ~ 10AM - 2.30PM
          Sat, 5/12 ~ 1PM - 5PM
          Fri, 5/18 ~ 6.30PM - 9PM

"Huns of Steel" came with the "Armies of Oblivion" module which introduced Allied Minor Armor to the game. I had not played to many of these scenarios as most of them are a bit larger. HeavyD and I were looking for something large to play and decided on this scenario. It's got an impeccable ROAR rating (18/20) and is heavy on Armor. The scenario takes place in July of 1942 after the Germans have turned South during Fall Blau. The recently arrived in Theater Hungarian 1st Armored Field Division has been tasked with reducing one of the three remaining Russian bridgeheads on the West bank of the Don River.

The Hungarians have an impressive Order of Battle. Entering on turn one is the main force of 20 squads on motorcycles and horses along with 9 AFVs. The Infantry (ELR 3) consists of 12 4-4-7s and 8 3-4-7s. The 4-4-7s are riding horses while the 3-4-7s are mounted on motorcycles without sidecars. This strong force is led by 2 8-1s and a single 8-0. The group has a decent support weapon collection consisting of 2 dm MMG, 3 LMG, 2 dm MTR (50mm). The Armored force has 3 Pz IVF2, 3 LT vz 38(t)E's and 3 38M Toldi I light tanks. That's 3 75Ls, 3 37L and 3 20L main armaments. This group also has an 9-1 armor leader. On turn 3 another armored forces enters, this group has 2 Pz IVF2, 3 Pz IVF1 and 2 40M Nimrod. This adds two more 75L, 3 75* and 2 40L(8) MA's to the Hungarian force.

The Russian OB consists of an on board force with 18 squads, 2 road blocks and wire supported by one 76L ART. The Infantry (ELR 3) is 14 4-4-7s and 4 4-2-6s led by an 8-1 and 8-0. This force has an HMG, MMG, 2 LMG, 2 MTR (50mm) 3 ATR and 10 "?" markers. On turn 2 the Russians have 2 Valentine V(b) and 4 Stuart III(a) enter in support. This is followed on turn five by 3 more T-34 M41's (radioless). All told the Russians have 4 76L, 2 40L and 4 37LL tubes facing the Hungarian force. The Russian tanks are much better armored then their opponents.

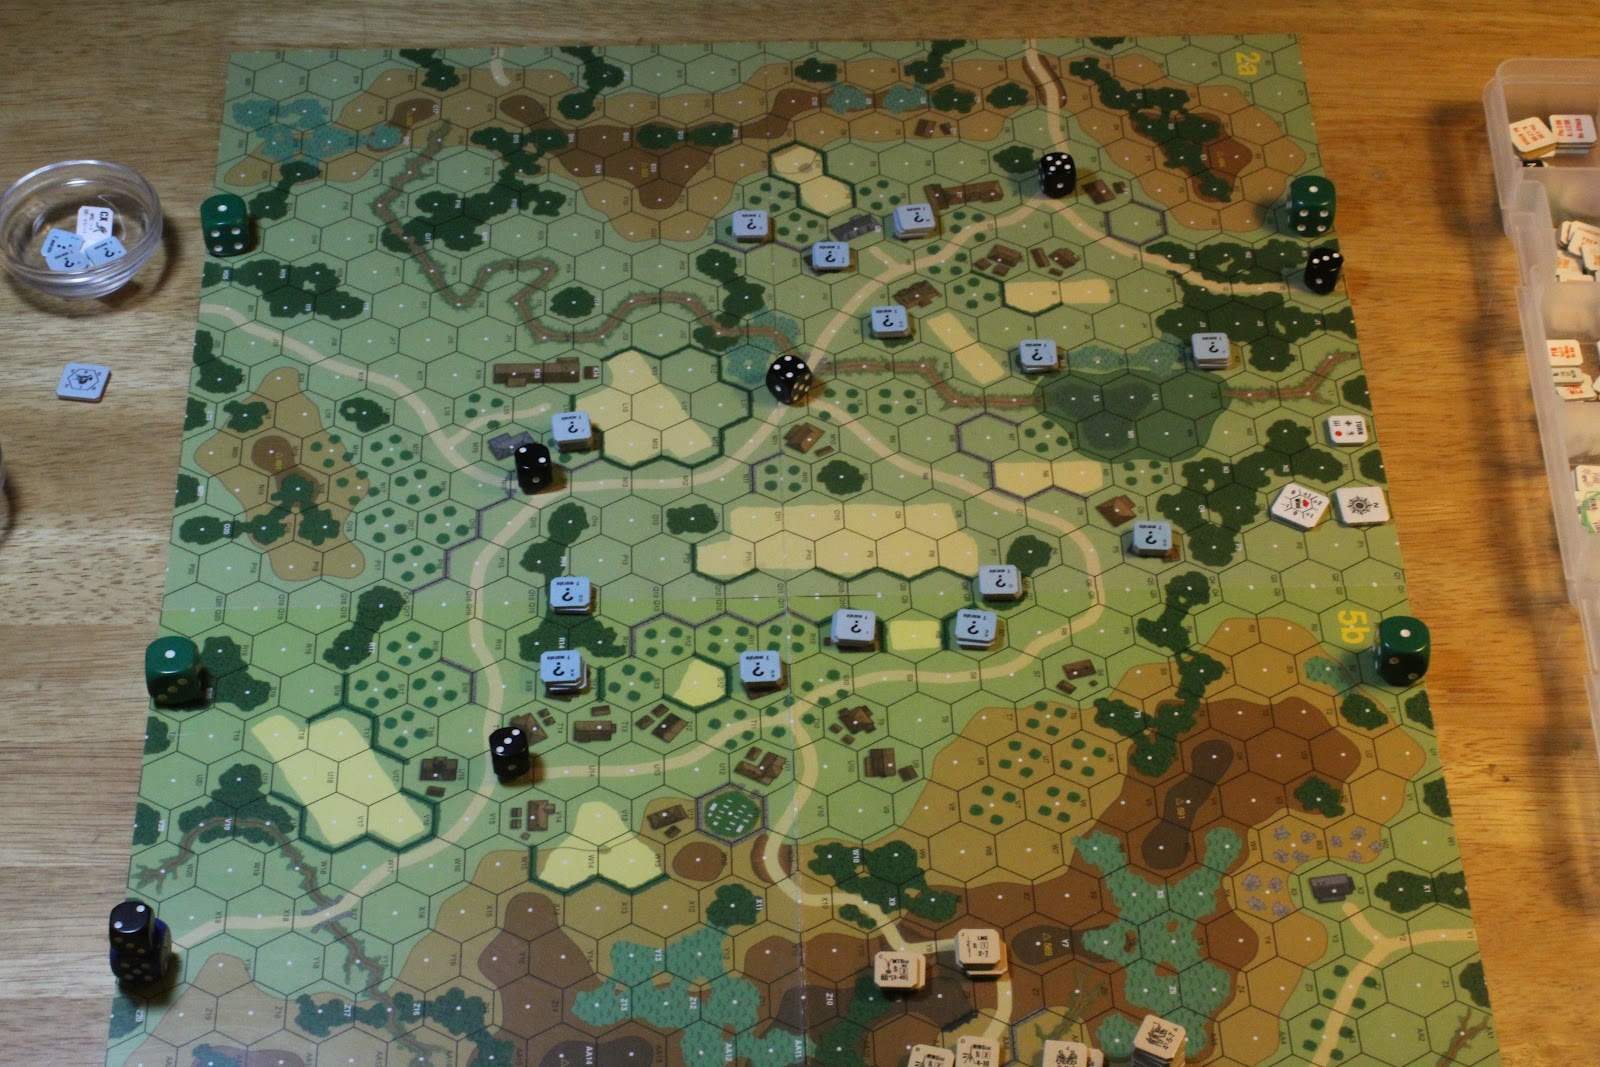
After Set Up, prior to the start of the scenario
 The map (boards 44, 48 and 43) are largely open with lots of grain and orchards. There is a long thing town in the middle of the map with many wooded buildings. The Rv1 overlay is user and creates a river on board 43. There are two multi-lane pontoon bridges spanning this river. ECs are dry with a mild breeze blowing from the NW at start. All of the Hungarian LT 38 tanks begin the game with their 4 FP BMG permanently disabled. The Victory conditions have the Hungarians tasked with clearing out two sets of hexes near in front of the pontoon bridges of Russian GO MMCs and AFVs with functioning MA. These hexes are open and site rite next to the river. There is a cluster of building commanding one of the victory locations, this is a strong position with several 1st level multi-hex stone buildings. The other victory location is lacking any real terrain other then a large amount of grain.

Approach, Turns 1 and 2

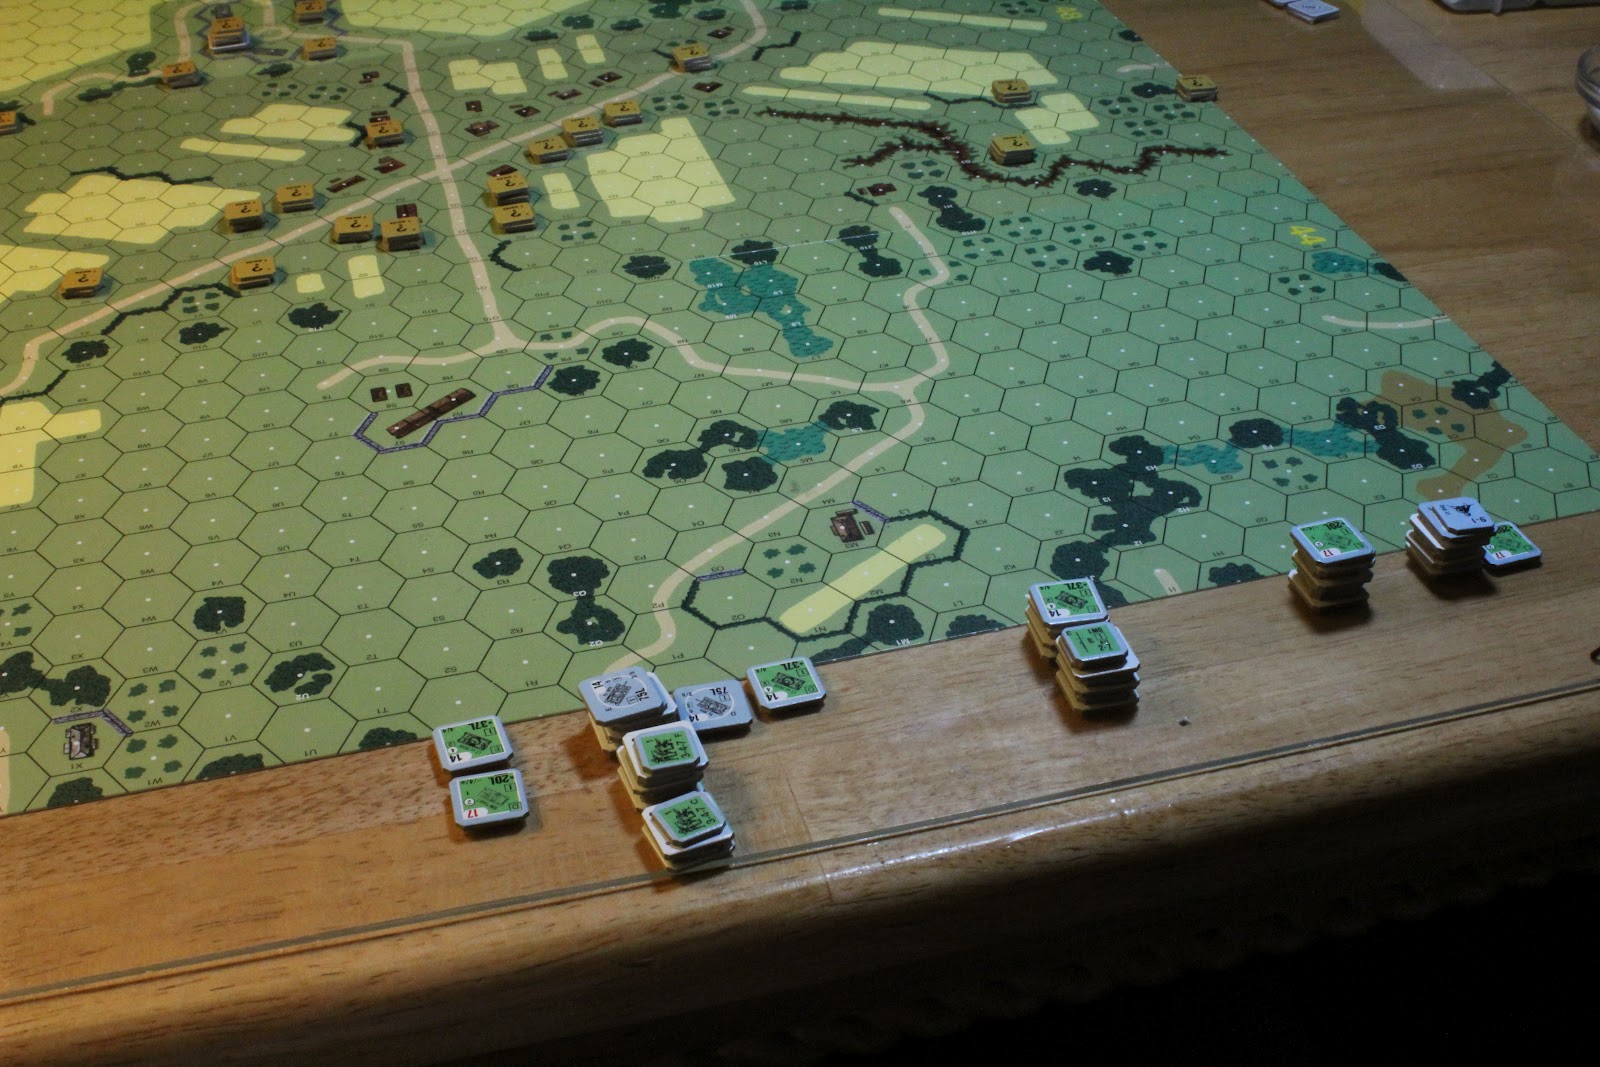
The Hungarian entry
After I see HeavyD's set up its clear that he's going to make his stand in the town. In a few turns it will become more clear to me why he elected to do this. For now though I am thinking that with the mobility of my force that he's made the wrong decision. I would have set up a screen of Infantry in the town (4-6 squads) and little else, enough to keep my vulnerable riders honest. I would have based my defenses on the two river crossing area's. One of these are near a cluster of stone multilevel buildings while the other is really in the middle of a sea of wheat fields. Here though he could have taken advantage of the Wire and the Russians advantage at digging foxholes. This coupled with the arriving Russian armor would have, IMHO made a very tough nut to crack.

The Hungarian Right, End of turn 1

End of Movement in the Center on Turn 1

I set up and enter in two groups. The Cavalry with some of the armor is on the right while the motorcycle borne Infantry is entering along the road in the center. There is enough cover to allow me to cross most of the first board and dismount on the first turn. The turn is largely uneventful as hordes of Hungarian Infantry and Armor enter the board. My half of turn 2 sees the sea of green approach the town protected by its armor. I break an MA on a IVF2 but other then this there is not a lot of action on this turn either. Most of my armor is 1-2 hexes from the town with my Infantry right behind the tanks. Due to the many hindrances HeavyD is not afforded many opportunities to fire at me.

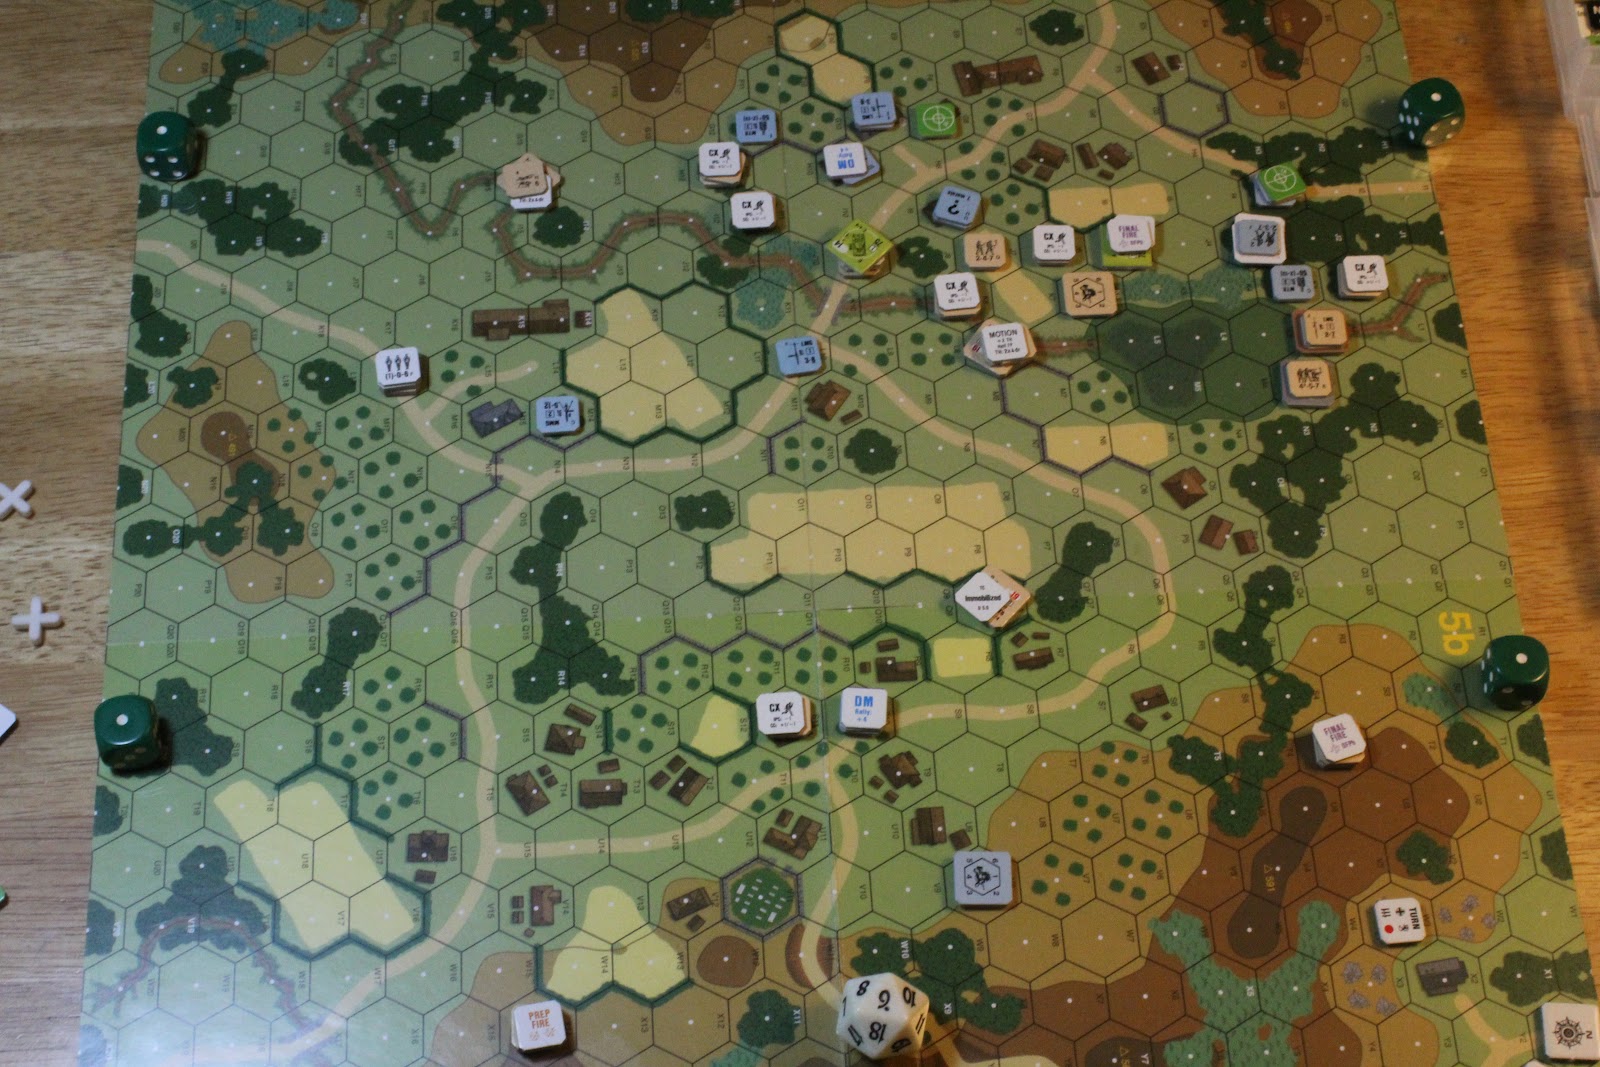
Start of Russian Turn 1

The bottom of turn 2 is when things started to get interesting. HeavyD's first set of armor arrives. He opens the turn by knocking out one of my light tanks on the right with his hidden 76L ART gun. He then sends two of his Stuarts over to my right, near the 76L ART. Another Stuart goes for the middle of town while the last one goes out on my left, alone. The two Valentines he leaves on the far side of the river...they're very slow.

Hungarian Movement Phase, turn 2

Crossing the Street, Turns 3-5

Turn 3 see's me get the balance of my armor as reinforcements. I decide to send the two F2's over on my left and send the three F1's up the middle to help out clearing the town. A scenario of this size adds a level of thinking to contend with. I have to decide which area of the board should get reinforcements and which area's to focus my efforts on, most of the time the size of the scenario doesn't call for this sort of decisioning as its usually very straight forward. I really like the added layer of complexity here.

Start of Russian Turn 3, Town

Start of Russian Turn 3, the right flank

HeavyD's fortifications are making it much harder then I thought it would be to break into the town. He has wire covering a section of the town and both roadblocks are blocking the roads into town. I am forced to go around the wire and this is proving a challenge. It finally dawns on me that he's placed his HMG in the middle of the road to interdict my crossing it. This explains why he placed his ART over on my right and why he sent two of his Stuarts over there to support it. I decide to focus on the center of the town and on my left which is only covered by a lone Stuart. I make some progress in town but I have time on my side so I am advancing cautiously. During the bottom of turn 3 I finally start to break some of the towns defenders. HeavyD doesn't do much with his Stuarts on his turn, leaving them in place mostly.

The Russian center starts to crumble, End of turn 3


Turn 4 sees a lot of action across the board. I start on the right side of the town. I place some smoke to cover my advance. I then drive across the street with a couple of the LT38s. I am giving him bad shot opportunities from his middle Stuart while I stay out of LOS from his ART gun and the Stuarts supporting it. I am trying to put pressure on the HMG. On the left side of town things are starting to crumble for HeavyD's defenders. I am around the wire and bring up the AA tanks to support my movements here. I send two F2's after the lone Stuart on my left which is unsupported and take it out with bounding fire. It's only the 2nd tank lost to either of us thus far in that game, we are both being very cautious with our armor. Little happens during the bottom of the turn other then HeavyD getting a leader creation at exactly the right spot (the middle of the town) and at the right time (he is leaderless this far forward). HeavyD elects to play it cool and doesn't try and press the issue with any of my forces mostly skulking or taking bad prep shots.

Crossing the Street, Hungarian movement, turn 4

Clearing out the other end of the town, turn 4

A lone Stuart falls, turn 4

Turn 5 opens with my Infantry having cleared my side of the town with the HMG still able to shoot down the length of the road. Most of his initial infantry is not  on the board or trickling back the the stone farm area near the left hand bridge. I finally repair the MA of one of my F2's (75L) during the rally phase. I start by going after the Stuart in the middle and he misses his defensive fire shots at my F2, I stupidly think I'm going to drive a LT38 past the now fired Stuart when he nabs it with an adjacent intensive fire shot, this is my first tank lost in several turns. I am able to get smoke on the road and start moving Infantry across it. I send a lot of armor through the town. The two F2's go after a lone Valentine covering the left hand bridge, this also places them with good LOS's down the road that will see the T-34's arriving during HeavyD's turn. My right doesn't see a lot of action as HeavyD is still strong over there with his two Stuarts supporting the 76L.

Start of Hungarian turn 5

Intensive fire takes out a LT 38 in center
HeavyD brings his T-34's on during his half of turn 5. They are radioless and thus are not nearly a mobile as they can be. He decides to send them after my two F2's covering the left hand bridge (near the stone farm).  I tag one of them before they reach the bridge. The other two make it across the river, I break a MA on one of the F2's intensive firing and get an acquisition with the other F2. The Valentine uses the arrival of the T-34s to make good his escape, driving into the woods across the river. The lone Stuart in the middle of the town is able to shock my F2 and then goes down from the fire of the other 3-4 tanks that are parked nearby. On my right HeavyD pulls the two Stuarts back towards the river, I have essentially forced him out of this position by my manoeuvrings. The HMG is still there but it shrouded in smoke and its armored protection has left it isolated.

Start of Russian Turn 5

T-34 goes down to defensive first fire

Two T-34s make it across the River

End Game, Turns 6+

Start of Turn 6

Two more T-34s go down

The end of the HMG

Turn 6 opens with my two F2's, one of which has a malf'd MA sitting two hexes away from both of the T-34's. This action will be key, if I don't take these two monsters out I will have to send more tanks after them and they are now sitting literally in the victory locations. Things start out well on the prep fire phase when I immobilize one of the beasts forcing the crew to bail and then with my intensive fire shot I shock the 2nd T-34. During the movement phase I rush another F2 over where I have an LOS to the shocked T-34. I send another tank into the stone farm complex to compel the tanks crew to rout across the river instead of into the farm houses. The HMG finally dies in the close combat phase when I run a LT38 in there with a couple of squads.
Start of turn 7

Into the wheat field, Hungarian movement phase, turn 7

Across the River, Turn 7

Turn 7 sees me repair the MA of the F2 on my left. I send those two tanks across the bridge taking out the Valentine that is sitting on the bridge on the process. I send the other couple tanks in the area in to support the assault on the stone farm complex making it very warm for HeavyD's few remaining defenders. In the Center I send the rest of my armor into the grain field towards the second bridge. Here HeavyD has the Valentine sitting in the bridge entry hex covered by the two remaining Stuarts further back to my right. By getting this close to the bridge and threatening the Valentine I have forced HeavyD to counter attack into my tanks with his two remaining Stuarts. As my two F2's are on their way to the area and will arrive next turn its a futile plan at best and HeavyD throws in the towel. I have too many tanks remaining against his three. I also have two complete turns remaining to finish him off.

The End
In the end the T-34's going down without taking out ANY of my tanks was the twig that broke HeavyD's back. That being said we played this scenario out over four days and eleven hours and we were both extremely happy with the scenario. This was easily one of the best ones we've played this year and I can see why its so tightly balanced on ROAR. I would eagerly play this one again as either side.


Monday, May 28, 2012

Under the Lily Banners (GMT) ~ "Alerheim"

Game: Under the Lily Banners (GMT)
Series: Musket and Pike Battle Series, Volume III
Scenario: Alerheim
Participants: Bob H, Myself
Time: Thu, 5/10 ~ 7.00PM - 9.00PM
         Sun, 5/13 ~ 2.00PM - 4.00PM
         Thu, 5/17 ~ 7.00PM - 9.00PM
         Sat,  5/19 ~ 2.00PM - 3.30PM

The Battle of Alerheim took place on the 3rd August, 1645. The French were driving the Bavarians back and Mercy decided to dig in and fight. The battle has a lot of interesting lore associated with it as does the Campaign of that year. As Alerheim is the subject of a project Bob and I are working on we decided it would be great to play this scenario from "Under the Lily Banners", the third installment from GMT's popular Musket and Pike Series. Bob and I had played one other MPBS scenario recently, Halmstad. Thus we were both fairly current on the rules and didn't have to do much to prepare for this game.

This is an interesting scenario as its got a fortified town smack dab in the middle of the map. It's also got some pretty interesting special rules. During the Battle, Mercy was killed (the Leader of the Bavarian forces) and the French were able to talk the Bavarians into surrendering in the Center. The town also caught fire during the battle leading to much confusion. The French outnumber the Bavarian/Imperial Force by about 25% in Infantry and 45% in Cavalry. The French are on the Offensive while the Bavarians have the town as well as nearly all of their other forces behind fortifications. The French are also hampered by not being able to use (move through) the gully on their Right until the Bavarians do (they had not thoroughly reconnoitered it prior to the battle). I ended up being the French player.

Alerheim Set Up

After I set this up I had a couple days to think about it before we started playing. Several times I told myself that there was little to be gained by smashing my Center wing into the town to start things off. I have played this series enough to know that I would end up getting the short end of the bargain on that one. Yet in this game (to its credit) its hard to pull off what I wanted to do, which is lead with the Left wing and hold with the Center while the Left was decided. Do to the way that one is bound to move towards the nearest enemy unit when under Charge orders I knew that some of my left wing would drift over to the town. So in the end I elected to lead with the Center first. Of course I had some nice Artillery in my Center and who can pass up a chance to open a Battle with a big salvo from his cannons?

Turn 1

As my Artillery harmlessly lobed shells into the town started my Center wing in towards the town. I used my first activation to fire my Artillery and align my forces to better engage Bob on the 2nd impulse. Since I had my Army Leader (AL) stacked with my Wing Commander (WC) I was easily able to continue the wings activation enabling my to engage Bob on the 2nd activation. Bob tried to preempt me here with his center and failed. As we started the melee's for that activation I realized why I didn't want to do this in the first place. I was getting shredded, but I did manage to push Bob out of one of the towns hexes in this initial assault. I lost two units as well.

The Assault on Alerheim (pre-melee)

After Melee

The action then shifted over to my Left Wing. Here I had a very nice force of mostly elite (8 Morale) Cavalry supported by six Hessian Infantry regiments (6 Morale) and a heard of sub par Hessian Cavalry. I was forced to cross a stream on the opening move so on my continuation (after Bob again failed to preempt me) I switched to Receive Charge and  spent the activation redressing my lines (reform actions). Again I ran Conde (my -2 AL) over to help with the continuation and orders change rolls and this helped out quite a bit.

The French Left Wing Advances on Turn 1

The Bavarian Left
 As I was out of Charge ordered Wings, the action switched over to Bob's Left where he stayed in Make Ready and moved his Wing down off the slope and closer to me. He ran Mercy over to help out with continuation but rolled poorly and Finished early. I followed with my Right wing, leaving them in MR (Make Ready orders) and moved them up a couple of hexes. Bob then did his Left and Center wins, each of whom were not able to make any continuation attempts because they failed preemption try's earlier in the turn.

Turn 2

Start of Turn 2

At the end of the first turn we started rolling to see which hexes in the town caught fire and three of them went up in flames. As my Center was the only wing in Charge we started there for the turn. I made one attack on the town which Morale Broke Bob's unit and made some cautious moves with the rest of my wing, trying to keep them out of the town. I was able to continue with the wing and switched them over to Make Ready (with Conde's help).

Turn 2 Action around Alerheim

The action then went over to Bob's Left Wing. Bob was clearly leading them out to have a go at my Right Wing. I was amazed as I thought this was giving away the advantage of him being mostly behind the Gully which was not really a Gully. He continued and then switched to Charge and it was on.

de Werth leads his wing in an attack on the French Right

Near the End of de Werth's activation


Bob had a pretty good Wing, most of the units morale was 8, but he also had 5-6 "Arq-Busters"(Arquebusiers) which do not line up against normal Cavalry (Curassier) in melee very well (-1). Thus with him charging I was able to make Interception attempts (0-4 [on a d10] as I was in Make Ready) giving me the all important +2 Momentum DR for the melee combats that followed. So it went, he would move a unit forward and I would Intercept it and we'd have the melee, then he'd activate the next unit and before long we'd gone through most of his Wing. It was a viscous fight. Both sides lost several units while having several others pursue off the map (and thus be out for the rest of the game). Near the end of his activation, de Werth charged forward with a unit and ended up in front of his wins and facing my 3rd line of Infantry completely isolated.

End of de Werth's Activation

When the dust settled after Bob's wing was finally finished with its assault, it was my turn to return the favor. I activated my Right Wing and they were able to convert to Charge mode. The first thing I did was go after de Werth and got him with a Cavalry charge. Bob rolled a 9 and de Werth was KIA'd (+10vps). It continued to go well for me after that. I then charged the unit that Mercy was stacked with and blew the melee roll, Bob rolled on the pursuit table and took me out, but it left him again in front of his lines with Mercy stacked with a FB (formation broken) Cavalry unit. I continued and was able to bring my Infantry up and take out the unit, sending Mercy off the map with very low odds of coming back on. This was turning into a disaster for Bob. We both lost a few more units and Bob had a couple fleeing in Morale Broken status as well. If Mercy didn't come back at the start of the next turn, I could start trying to get Bobs units in the town to surrender via the special rule for this scenario.

Mercy's Demise

The rest of the turn was quite. Bob's Right Wing didn't do much. His Center stayed put and fired its Artillery while I finished reforming my Left with the remainder of the turn. 

Turn 3

Start of Turn 3

Bob had a one in ten chance of having Mercy return to the game and he did it. He rolled a zero and Mercy returned to the map. I then made a roll for my Right Wing leader (Gramont) who also amazingly made a return (after exiting at the end of the last turn on a cavalry pursuit). We also had a chance to count up VPs due to losses and it was very close with Bob having lost 55 to my 65. With him still possessing the town and the other victory locations, I was still very much having to attack to earn a victory. We also rolled for fire spread and a few more hexes in the town went up in flames.

Action on the French Right, Turn 3

The French Right continues its counter attack

The action then started again on my Right. I continued in Charge orders and sent several more units running under Morale Broken. I then Continued and switched to Rally orders to start reforming and rallying my remaining units. Bob spent most of his wings (his left) doing the same, ending in Rally mode and quickly trying to restore the confidence of the few units he had remaining.


Bob then did his Right Wing and then I did my Center...both of these activations were quiet with not a lot happening. I then brought my Left on line and converted them to Charge orders. Here I had the advantage in Morale and troops strength where Bob had the slope to his advantage. When my charging Cavalry came into view, he could intercept me and would have the added advantage of me just becoming FS (formation shaken) due to the crest line. Bob's luck didn't hold here though...we knew already that his dice liked to roll 0's (to get his leader back) and it continued to do so here on his interceptions. He went to his back up dice and this helped a little. When my wing finished I had taken the crest line and smashed his first line of cavalry. I wasn't in very good shape either but I had two more lines behind me and Bob only had one.

After the French Assault on the Left

At the end of the turn we spread the fires in the town (it was really going now) and counted loss VPs. I had lost 95 VPs worth of units and Bob had lost 105. It was slowly turning in my favor, especially because I had largely won with my Right wing and still had some mopping up to do there whilst Bob didn't have much on his Left.

Turn 4

I started on my Left and converted the wing to Make Ready, reformed where I could and brought up the next two lines. I then continued and converted to Receive Charge and was able to reform most of the Wing. Here again my -2 leader was a real asset allowing me to have three crucial activations to reform the wind and re position it to continue the fight. Had I rolled poorly on my continuation attempts I would have been very vulnerable to counter attack my Bob. Bob went to Rally with his Right and started to reform/rally with his units, he had not interest in counterattacking me at this point. Here he made a grave error that we shall get to later. It didn't occur to me at the time.

Start of Turn 4
The French Left Wing Reforms on Turn 4

I then went to my Center and continued to move them around the town in Make Ready while Bob was shelling me with his Centers impressive Battery. I hoped that I would not have to charge his center with mine as his was still in good order behind fortifications and supported by artillery. Bob didn't do anything with his Center on his next activation so the action moved over to my Right Wing where I was in Rally. I converted to Receive Charge and moved to get back in command and reform where I could. My thinking at this time was to try and get around Bobs Center with the remains (5-6 units) of my Right and make trouble for him as I also assaulted with my Center. Of course in MPBS this is much easier to say then it is to do.

The French Right, turn 4
Bob and I had a chat about how interesting this was for us. We have played many of the MPBS scenarios over the years and for us at least, many of the games only last 2-3 turns before its very clear who is winning. Here, while things were certainly going a little in my direction, the game was far from decided. Things were by no means clear as we ended the fourth turn. Thus we eagerly decided to continue on and see what happened.

Turn 5
Start of Turn 5

My Center was the first Wing I activated on Turn 5. The front line of this Wing was taking a beating from Bobs artillery only 4 hexes away and so I stayed in Make Ready and reformed my first line as I continued to move the rest of the Wing around the town. Bob then went all 20th Maine on his left and converted to Charge Orders with his two remaining non-MB units. We split the melees and when it was my turn to activate my Right I also converted to Charge and tried to get his last remaining good order unit and was repulsed heavily. Bob then brought his Center on line and again pounded my first line of Infantry, inflicting more damage on their formation. He also started to move his Cavalry (2nd line of his Center) over around to his right to protect his Centers flanks, it was as if he was reading my brain waves!

The Bavarians repel the French Right

My Left Wing was next up and I converted to Charge right away. Here is where we discovered the severity of Bobs error from last turn. As Bob's Right Wing was in Rally orders, he could not make interception attempts. This was huge as I was able to engage him without having to face his counter-charges. His second line of Cavalry was still in good shape and would have been able to disrupt my assault. I moved up and engaged five of his units. I won three of these fights. But again I was vulnerable as with this last activation I had moved the rest of my Wing up on the slope and all of them were in FS status. Then I uncharacteristically failed my continuation roll. Bob had 6 good order Cavalry units ready to charge me. He was heavily outnumbered though and was not going to be able to make use of momentum for most of the attacks. He was in Rally orders and his Army Leader was on the other side of the battlefield trying to keep the MB units on that side from leaving the field. His Right Wing Commander was only a 0 leader thus it would take some amazing dice to get that Wing into Charge orders quickly enough. Bob had had enough though and surrendered the field to me.

The Decisive moment on the French Left

The French break the spirit of the Bavarians

I was not convinced that he was totally out of it at this point though. We had not counted Loss VPs for two turns and while I was in the lead there he still had the VP location (+10 VP) which might have played a part. Non the less, Bob was done and we ended it there. After Bob left I counted up the Loss VPs and I was ahead by 50 (145-95) so adjusting for the VP location I had a 40 VP advantage. This was just enough for a French Decisive Victory. Had we continued I think baring some amazing dice by either one of us we would have been playing to decide what kind of French victory (Marginal or Decisive) it would have been.

Map at game end

So this turned out to be one of the best MPBS experiences either one of us has had in many years. We played the scenario for over seven hours and that is rare for a MPBS scenario. The game was in doubt right up until the end of the 5th turn, which for us doesn't happen that often. Both of us thought that we did an excellent job of playing by the rules, which again was nice as we had only played the series once in the last couple years. Bob had a good time despite some terrible dice on his part. While I rolled well in some important continuation situations and again well in converting orders, the battle dice were mostly even except for when Bobs Right Counter-charged my Left. We both had several leader losses and equally improbable leader returns. Not a bad way to spend several days in May.

Wednesday, May 16, 2012

Advanced Squad Leader (MMP) ~ "Rude Mood" AP79

Game: Advanced Squad Leader (MMP)
Scenario: "Rude Mood" AP79
Publication: Action Pack 8: Roads to Rome
Participants: Jim "HeavyD" D, Myself
Time:  Fri, 4/20 ~ 6PM - 8PM
          Sat, 4/21 ~ 12PM - 2PM


"Rude Mood" continues with the theme of dynamic Victory Conditions found in most of the scenario's in AP8. This one appealed due to its size and it's even ROAR rating. HeavyD and I are both enjoying these scenario's and the interesting VC's they present the players. In this one the Free French player is tasked with clearing a road of German defenders while at the same time taking all of the buildings in the German set up area. There is a sudden death component to the VC's that play out over the first three turns. In order to not loose, the FF player must control a number of buildings equal to the turn number times 3, thus the FF player has to control 3 buildings on the first turn, 6 the second and 9 by the third turn, this then allows them to fulfill the above mentioned VCs by the end of the game. The FF player can also win during the first three turns by controlling five times the turn number, so again if the FF player can control 6 buildings by the end of the first turn he can win (11, the 2nd turn and 16 the third).

HeavyD's Set up

VCs like this create tension early in the game for both players. It's a little like having two separate scenarios going on at the same time, the early game where either player can win; then if there is no winner the late game changes the dynamics of the scenario and forces the players to change gears. I found this one quite enjoyable as during the first three turns I was faced with thinking through two sets of VCs and trying to manage the game towards those two ends.

My Set Up

The German player is defending in this one. Elements of the 90th PG Division are set up in a town facing a big hill on which the Free French player will set up on. The German players force consists of 8 4-6-7s, 2 2-2-8s lead by 2 8-1s and a single 7-0. This force has a 50L ATG as well as a 20L AA gun backing them up. The Infantry also has a MMG, 2 LMGs, 2 50* MTRs and 6 Concealment counters. The German player is able to set up concealed if he sets up in concealment terrain.

The Free French forces come in two groups. The first group sets up on board and consists of 9 4-5-7s, 2 2-2-8s lead by a 9-1, 8-1 and an 8-0. These forces have 2 MMG(a)s, 3 LMGs and 2 60* MTR(a)s. This group sets up on the hill overlooking the town that the Germans are defending. On or after turn 1, a second group enters the map along the South edge, this force contains 3 4-5-7s and a 9-1 along with 2 M4A2(a) tanks and 3 M5(a) half tracks. There is a mild breeze blowing from the SW and the FF forces are both Stealthy and may initiate HtH CC as if they were Gurkhas. As I was the defender in our last scenario, I was the Free French player in this one.

As I sat down to look at the board after HeavyD's set up I knew we were in for a wild ride. HeavyD set up his forces in two main groups, the nearer setting up to hold onto the nearest buildings with the other force across the gully playing for the end game. I set up to target three buildings that looked like I could get some forces into Melee on the first turn. I had my mobile force set up along a road allowing the option of bypassing HeavyD's initial force and making a run at the 2nd set of buildings in front of the gully dividing the town.

Turn 1

Turn 1 Prep Fire

Things started off very well for me as my 60mm Mortars tore into HeavyD's concealed forces with abandon. My initial shots were long range ones at a concealed stack of three counters set up in a walled orchard hex. I opened with a CH and killed the leader there while breaking the squad possessing the MMG. After prep I moved out against the town and made good progress. I was able to use cover to make HeavyD's shot selection very tough. I lead with half squads and largely was able to get next to the three buildings I needed without taking many losses or having too many broken squads. During the course of the movement phase my sniper located and wounded HeavyD's 7-0 who was concealed. I thought this was a concealed squad and when it turned out to be a leader I was able to take advantage of that as well by making more aggressive moves then I would have.

Turn 1 Movement Phase

Turn 1 on my Right
 Based on my early luck in breaking HeavyD's MMG stack I decided to risk a tank and a HT with a squad in it to make a dash at this position, I was forced to move by one of his occupied buildings and take a 8+2 shot which ended up breaking one of the HSs in the half track. This was a set back but I was able to get the squad and MMG the next turn as he had trouble routing. I sent the other tank and two half tracks into the town to support my Infantry's efforts to take the buildings I needed to stay in the game. The rest of the turn continued to go well as I was able to take 5 buildings by the end of my turn. This was one short of the six I needed for an auto win on turn one.The 2nd half of turn 1 went quickly as most of HeavyD's front force was broken. He made some minor adjustments and largely left his 2nd group in place.

End of Free French Turn 1

HeavyD ponders his move during his part of Turn 1
Turn 2

Start of Turn 2
The German 50L ATG is found out

With my successes on turn 1 I knew that I would not have to worry about loosing the game due to not taking enough buildings and was able to think long term. Knowing that I had not yet seen the two hidden guns and the geography of the map also meant that it was highly unlikely that I was going to be able to get a win in turns 2 or 3. This was actually a benefit as I was able to still play aggressively but not recklessly. This turn saw me doing a little mopping up of Heavy's initial force while moving the bulk of my forces towards the gully and the remaining Germans lurking there. The 50L made an appearance, as I was able to scout out its location using half squads prior to even moving a vehicle. I was able to get into CC with the guns crew and take them out at the end of the turn. Once the gun was reveled I was able to move much more aggressively with my two tanks. HeavyD's 2nd turn was again a quick one as he didn't have much to do. My highly skilled mortar crews once again struck, eliminating the crew that was manning one of his mortars in the village.

End of Turn 2

Turn 3

Free French progress in the Center on Turn 3
My Right, Turn 3

During my movement phase on turn 3 I was able to advance at a brisk pace and close the distance on the remaining Germans. Over the course of the turn things started going from bad to worse for HeavyD as I was able to get closer and closer and his efforts to thwart my advance largely went unnoticed. Given that we still had 4 more turns to play HeavyD threw in the towel at the end of the turn. The combination of my Mortars tearing up his concealed forces and my tanks running around without worrying about the ATG I was able to quickly get very close to his remaining forces who where without a leader.

Map at the end of the game (Turn 3)

This was a fun scenario for me. HeavyD, while getting smashed still had a good time as we saw a lot of interesting things happen. One needs to be prepared for this one to end early as the VC's force each player to commit to not loosing on the first three turns.